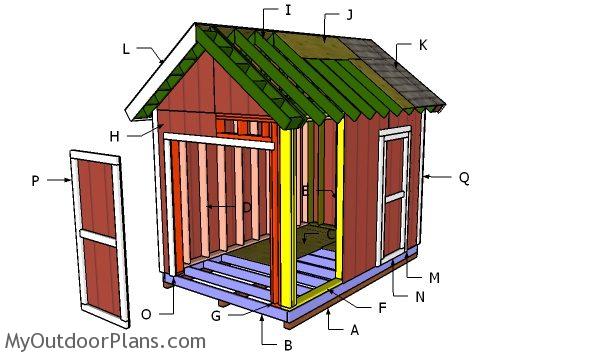
Alright, you're ready to take on a project, and building your own shed seems like a good idea. You've got an 8x10 space in mind, and you're thinking "budget-friendly" - let's do this! I'm here to guide you through every step, from planning to painting, with a focus on keeping costs down without sacrificing quality.
Step 1: Planning and Preparation
First things first, let's get organized. Before you start buying lumber and dreaming of a perfectly organized tool shed, you need a plan.
Design and Size: 8x10 is a great starting point, but do you need extra storage? Consider a slightly bigger shed (maybe 8x12?) or adding shelves for vertical storage.
Location, Location, Location: Where will your shed live? Make sure it's on level ground, and ideally, near a power source and an easy access point. Think about the direction of the sun for natural light.
Building Permits: Check with your local building department to see if you need a permit. This might save you headaches later on.
Materials List: This is where things get exciting! Make a detailed list of all the materials you'll need. We're talking about lumber, screws, nails, plywood, shingles, paint, and more. Don't forget your tools!
Step 2: Foundation and Framing
The foundation is the backbone of your shed, so let's build it strong and steady.
Concrete Foundation: For a sturdy, long-lasting foundation, you'll need concrete. You can pour a full slab or build a foundation using pre-made concrete blocks. This is more expensive, but will last longer.
Pressure-Treated Skirting: If you're going for a cheaper foundation, consider building a base of pressure-treated lumber. This will help your shed breathe and protect it from moisture.
Framing the Walls: Once your foundation is set, you can start framing the walls. Use 2x4s or 2x6s depending on your location's building codes and the weight you plan on storing.
Door and Window Openings: Measure twice, cut once! Plan where you want your door and windows, and cut the framing accordingly.
Step 3: Roof and Siding
Let's get this shed covered and looking sharp!
Roof Trusses: You can either build your own roof trusses or purchase pre-made ones. This will depend on the complexity of your roof and your DIY skill level.
Roof Sheathing: Use plywood or OSB to create a solid surface for your shingles.
Roofing Materials: Choose the right roofing material for your budget and climate. Asphalt shingles are a popular choice, but you can also opt for metal roofing for a more modern look.
Siding: Pick your siding! Vinyl siding is affordable and low-maintenance, while wood siding offers a more traditional look.
Step 4: Finishing Touches
Time to make this shed truly your own!
Windows and Doors: Install your chosen windows and doors. Consider adding a lock to your door for added security.
Flooring: Choose a flooring option that fits your budget and usage. Concrete is a great choice if you're planning on using the shed for heavy storage.
Electrical and Plumbing: If you plan on using the shed for electricity or plumbing, make sure to install the necessary components according to local codes.
Painting: Time to paint your shed! Pick a color that complements your home and adds a touch of personality.
Step 5: Budget-Friendly Hacks
Building a shed on a budget doesn't mean sacrificing quality. Here are some clever tricks to save money:
Reclaimed Materials: Check salvage yards or online marketplaces for reclaimed lumber, doors, windows, and other materials.
DIY vs. Hiring: Consider doing as much of the work yourself as possible. This might save you a lot of money.
Negotiating Prices: Don't be afraid to negotiate with lumberyards and hardware stores. Shop around for the best deals.
Strategic Planning: Think about the materials you need before you buy them. Avoid impulse purchases.
Step 6: Finishing Up
You're almost there!
Clean Up: Once your shed is built, take the time to clean up any debris and put away your tools.
Organize and Decorate: This is the fun part! Organize your belongings and add some decorative touches.
Building an 8x10 shed on a budget is a rewarding project. It takes planning, patience, and a little bit of DIY spirit. Remember to enjoy the process, take breaks when you need them, and don't be afraid to ask for help if you need it.
Bonus Tip: Take pictures of your progress! This will help you remember the journey and share your success with others.
Now, get out there and build your dream shed! You've got this.


Note: Only a member of this blog may post a comment.