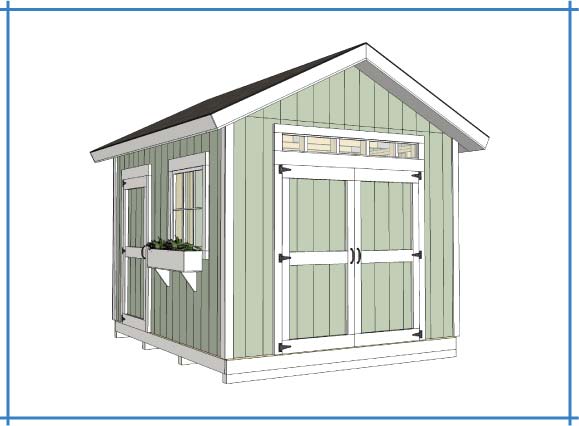
Alright, so you're thinking about building a shed. Maybe you're drowning in tools, dreaming of a cozy garden potting station, or simply need a place to stash the winter tires. Whatever the reason, a 10x12 shed is a fantastic choice - it's big enough to be useful, but small enough to be manageable and budget-friendly.
But where do you even start? Don't worry, my friend, because I'm about to share some secrets to make your shed-building journey as smooth as a perfectly planed board.
First Things First: The Blueprint
The internet is overflowing with free shed plans. You can find them on sites like Pinterest, Instructables, and even good ol' Google. Some are super basic, while others are detailed blueprints that include every single cut and measurement.
Pro Tip: Don't be afraid to combine plans! Find a roof design you love from one source, a window layout from another, and maybe even borrow some clever storage ideas from a third. Remember, this is your shed, so personalize it!
Materials: Keeping It Real
Now, let's talk about the materials. You're aiming for cost-effective, right? So, ditch the fancy stuff and go for the tried-and-true.
Wood: Pressure-treated lumber for the foundation and bottom plates is a must. It'll keep your shed strong and rot-resistant. For the walls and roof, opt for standard framing lumber - spruce, pine, or fir will do the trick.
Roofing: Asphalt shingles are classic and affordable. Don't be afraid to get creative with the color!
Siding: There are plenty of options here â€" vinyl is easy to install and comes in a wide range of colors. If you want a more rustic look, consider using corrugated metal or even recycled wood.
Windows and Doors: You don't need to go overboard. Simple, functional windows are more than enough. For the door, a pre-hung door will save you a lot of hassle.
Smart Savings: DIY is Your Best Friend
You're already on the right track by choosing to build your own shed! But there are a few more tricks to save money:
Buy in bulk: Whenever possible, buy lumber and other materials in bulk. You'll get better prices and avoid multiple trips to the lumberyard.
Shop around: Compare prices at different lumberyards and hardware stores. You might be surprised at the differences.
Don't be afraid to reuse: If you have old doors, windows, or even leftover materials from other projects, consider giving them a second life in your shed. A little creativity goes a long way!
Building Blocks: Foundation to Roof
Let's break down the construction process step by step:
1. Foundation: This is the key to a sturdy shed. Concrete piers are a popular and cost-effective option. Simply dig holes, pour concrete, and let it cure. You can even create a simple gravel foundation for a more rustic look.
2. Framing: Once the foundation is set, build the walls and roof using your chosen wood. Remember to follow the plans closely and keep things square.
3. Roofing: Install the sheathing and then the roofing felt (also known as tar paper). Once you're ready, lay the shingles.
4. Siding: This is where you can really personalize your shed. Attach the siding to the exterior walls using nails or screws.
5. Windows and Doors: Install the windows and doors using the pre-made frames.
6. Interior Finishes: Add some finishing touches! Paint the walls, install shelving, or add a floor if you want to make your shed even more functional.
A Shed is a Journey, Not a Race
Building a shed is a great DIY project that you can do in stages. Don't feel pressured to finish it all in one weekend. Take your time, enjoy the process, and celebrate each milestone.
Pro Tip: If you're not a seasoned builder, don't be afraid to ask for help from friends, family, or even local contractors. A little bit of assistance can go a long way.
Shed-Building Success Stories
Think of the possibilities! A 10x12 shed can be so much more than just a storage space. Imagine:
A Home Office: Escape the clutter and set up a quiet workspace for work or creative pursuits.
A Garden Oasis: Turn your shed into a potting station, a tool shed, or even a mini greenhouse.
A Guest House: Add some windows and insulation, and you have a cozy guesthouse for visiting friends or family.
The possibilities are truly endless! So, gather your tools, embrace the challenge, and build your own 10x12 haven. You'll be amazed at what you can achieve.
Remember, you're not just building a shed; you're building something that reflects your personality, your passions, and your dreams. So have fun, get creative, and enjoy the process!


Note: Only a member of this blog may post a comment.