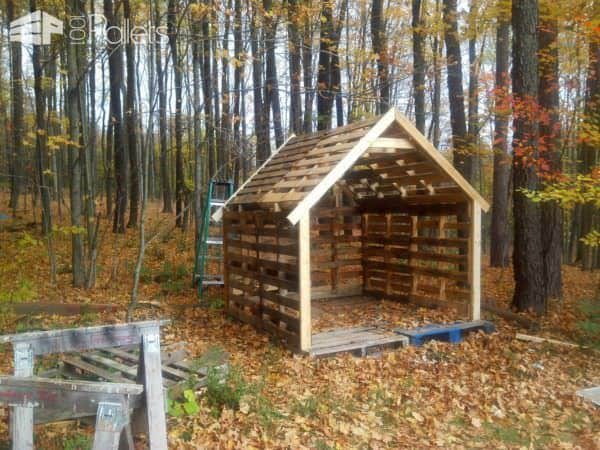
How to Make a Pallet Shed DIY: A Budget-Friendly Storage Project
Constructing a pallet shed offers a cost-effective and environmentally conscious solution for additional storage space. This detailed guide provides a comprehensive walkthrough, encompassing planning, material sourcing, construction techniques, and finishing touches, allowing for the creation of a durable and aesthetically pleasing structure.
Phase 1: Planning and Preparation
Before commencing any construction, meticulous planning is paramount. This phase involves several crucial steps to ensure a successful project outcome.
Defining Project Scope and Requirements
Initially, define the precise dimensions and functionality of your desired shed. Consider factors such as the intended storage capacity, available space on your property, local building regulations, and aesthetic preferences. Sketching a preliminary design, including detailed measurements and a material list, is strongly recommended. Accurate measurements are critical to ensure the structural integrity and functionality of the finished shed.
Sourcing and Assessing Pallets
The cornerstone of this project is the acquisition of suitable pallets. Source free pallets from local businesses, construction sites, or recycling centers. Thoroughly inspect each pallet for signs of damage, rot, or infestation before incorporating it into the construction. Prioritize pallets constructed from robust, untreated wood to ensure longevity and structural stability. Calculate the required number of pallets based on your shed's dimensions and the anticipated storage needs. Remember that you may need more pallets than initially anticipated due to potential damage or unusable sections.
Gathering Tools and Materials
Beyond pallets, several essential tools and materials are necessary for successful construction. This list should be compiled meticulously to avoid delays or unforeseen complications. The list includes, but is not limited to:
- Hammer
- Screwdriver (both Phillips and flathead)
- Drill with various drill bits
- Measuring tape
- Level
- Saw (circular saw recommended for efficient cutting)
- Safety glasses
- Work gloves
- Metal fasteners (screws and nails)
- Wood glue
- Plywood or other sheeting material for roofing and walls (optional)
- Paint or sealant (optional, for weatherproofing and aesthetics)
- Post hole diggers (if setting in ground)
- Concrete mix (if setting in ground)
Phase 2: Construction
This stage involves the actual assembly of the pallet shed. Accuracy and attention to detail are paramount to ensure a robust and stable structure.
Foundation Preparation
Begin by preparing a level foundation. The choice of foundation depends on factors such as the shed's size and the ground conditions. Options include a simple gravel base, a concrete slab, or setting the structure directly on treated timber blocks. Ensuring a level foundation is critical to prevent the shed from becoming unstable over time. Consider the weight of the completed structure when selecting your foundation type.
Wall Construction
Assemble the pallet walls by carefully attaching the pallets together using screws or nails. Prioritize strong and even joints to maintain structural integrity. To enhance stability, consider reinforcing the corners with additional wooden supports. For added strength and weather protection, you may choose to fill gaps between the pallets with plywood or other suitable sheeting material.
Roof Construction
The roof design can vary, depending on your preference and skillset. A simple gable roof is a common and relatively easy-to-construct option. For a gable roof, construct two triangular sections, and secure them to the top of the walls. Consider using plywood or other sturdy sheeting material to cover the roof, providing weather resistance and added protection. Ensure adequate overhang to prevent water damage to the walls.
Door and Window Installation (Optional)
If desired, incorporate a door and windows into your design. This can be achieved by carefully removing sections of pallets or by constructing a separate frame to integrate with the existing pallet structure. Ensure that any openings are securely fastened and weatherproofed. The inclusion of a door and windows significantly enhances the shed's usability and aesthetic appeal.
Phase 3: Finishing Touches
Once the basic structure is complete, attention should be given to aesthetic improvements and protective measures to ensure the longevity of the pallet shed.
Surface Treatment
To protect the wood from the elements and enhance its appearance, apply a suitable sealant or paint. Choose a weather-resistant product designed for exterior use. This will prevent rotting, warping, and insect infestations, extending the life of your shed considerably. Consider the aesthetic impact of your chosen finish and select a color that complements the surrounding environment.
Additional Features
Depending on your needs, you can incorporate additional features to enhance the functionality and aesthetics of your pallet shed. This might include adding shelves for improved storage organization, installing a lock for added security, or landscaping around the structure to improve its visual appeal.
Maintenance
Regular maintenance is crucial for preserving the longevity of your pallet shed. Periodically inspect the structure for signs of damage, and address any issues promptly. This may include tightening loose screws, repairing damaged sections, and reapplying sealant or paint as needed. Routine maintenance prevents more significant and costly repairs in the future.
By carefully following these steps, you can successfully construct a robust and aesthetically pleasing pallet shed at a fraction of the cost of a commercially built structure. Remember that safety is paramount throughout the entire process. Always wear appropriate safety gear, and take necessary precautions to prevent injuries.


Note: Only a member of this blog may post a comment.